DIY Insulation Removal: A Step-by-Step Guide
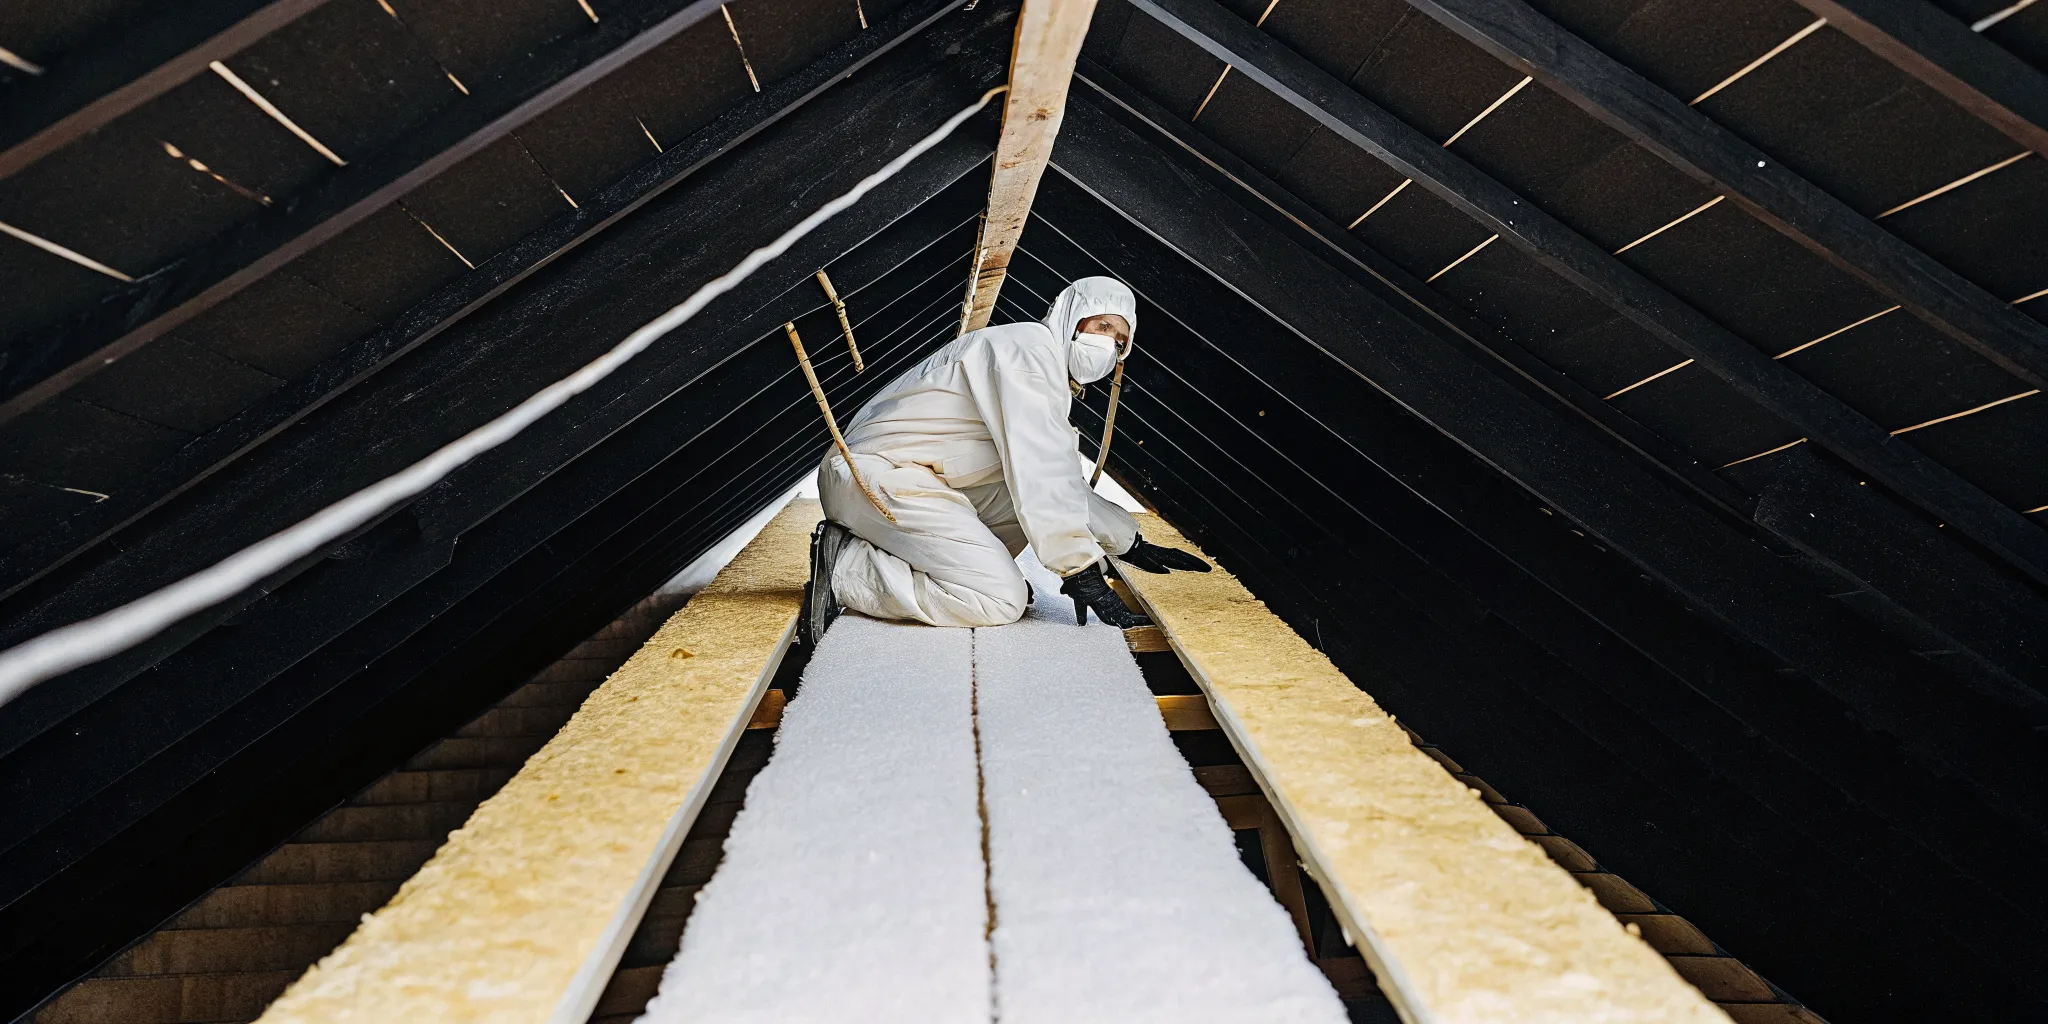
What’s hiding in your attic? Over the years, old insulation becomes a magnet for dust, allergens, and even mold spores. It can also become a home for pests, whose droppings can contaminate the air you breathe. Simply adding new material on top only traps these problems, affecting your family’s health and your home’s efficiency. A complete insulation removal is often the only way to create a truly clean and healthy foundation for your home. Before you climb that ladder, it’s critical to understand the risks involved and weigh them against the benefits of starting fresh with a professionally cleaned space.
Key Takeaways
- Know When to Remove vs. Add On: A full removal isn't always required; you can often add new insulation over old, clean material. However, if you spot any signs of moisture, mold, or pests, a complete removal is the only way to protect your home's air quality and structure.
- Prioritize Safety Above All Else: Insulation removal can expose you to serious hazards like asbestos, mold spores, and bacteria from pests. While a simple DIY removal is possible with the right protective gear, you should always call a professional to handle any contaminated materials safely.
- Hire a Pro You Can Trust: When choosing a contractor, verify they are fully insured and certified to protect your home. Ask them to detail their safety and containment process, and check recent customer reviews to ensure you're hiring a reputable team that stands by their work.
Why Should You Remove Old Attic Insulation?
You might be thinking, "Can't I just add new insulation on top of the old stuff?" While that's sometimes an option, it's not always the best move. Think of it like painting a wall: you get a much better, longer-lasting result if you prep the surface first. Removing old, ineffective, or contaminated insulation ensures your new investment performs at its peak. It also gives you a clean slate to address any underlying issues that could be affecting your home's health, comfort, and energy bills. Let's look at why a fresh start is often the smartest choice.
Signs It's Time for an Insulation Upgrade
Taking a quick peek in your attic can tell you a lot about your insulation's condition. If you see that it looks damp, compressed, or has visible water stains, it’s a clear sign it's no longer doing its job effectively. Another major red flag is evidence of pests. Look for droppings, nests, or tunnels, as critters love to make their homes in old insulation, destroying its integrity in the process. If the material is dusty, dirty, or breaking apart, it’s also past its prime. These are all indicators that your insulation isn't just underperforming; it might be contributing to bigger problems. A proper attic insulation system starts with a clean and sound foundation.
How Old Insulation Impacts Your Energy Bills and Air Quality
That old insulation isn't just taking up space; it could be costing you money and affecting your family's health. Over time, insulation settles and degrades, losing its thermal resistance, or R-value. This means more of that Texas heat gets into your home, forcing your AC to work overtime and driving up your energy bills. Beyond efficiency, old insulation acts like a sponge for dust, pollen, mold spores, and other pollutants. These contaminants can get pulled into your HVAC system and circulated throughout your home, potentially worsening allergies and respiratory issues. Simply layering new material on top won't fix the underlying air quality problem; you need to remove the source of the contamination first.
Hidden Dangers Lurking in Your Attic
What you can't see can definitely hurt you. Old insulation can hide serious problems that put your home and family at risk. Trapped moisture is a breeding ground for mold and mildew, which can release harmful spores into your air. Rodent infestations are another major concern, as pests can chew through electrical wiring, creating a serious fire hazard, and their waste can carry diseases. Removing the old material allows for a thorough inspection of your attic's structure, wiring, and ventilation. This step helps you find and fix hidden water leaks or damage before you install fresh, clean spray foam insulation or another modern material, ensuring your home is safe from the top down.
Gearing Up: Your DIY Removal Toolkit
Before you even think about climbing that ladder, let’s talk about preparation. Getting your gear and attic space ready is the most important step for a safe and successful project. Think of it as setting the stage for a much smoother process. Skipping this part can turn a manageable task into a messy, frustrating, and even hazardous ordeal. A little planning now will save you a ton of cleanup and stress later. Taking the time to gather the right equipment and prep your workspace ensures you can work efficiently and, most importantly, protect yourself and your home from dust, debris, and potential contaminants.
Essential Protective and Safety Gear
First things first: safety. Your attic's old insulation can be full of dust, fiberglass particles, and even unpleasant surprises from pests. You do not want to be breathing that in or getting it on your skin. Proper personal protective equipment (PPE) is non-negotiable. Start with a full-body disposable suit with a hood to keep itchy fibers and dirt off your clothes and skin. You’ll also need sealed safety goggles, sturdy gloves, and a high-quality respirator mask (an N95 is a good minimum) to protect your lungs. This gear is what the pros wear for a reason, as it helps prevent skin irritation and keeps your airways clear of harmful particles that get kicked up during removal.
The Right Tools for a Clean Removal
While you might be tempted to use a heavy-duty shop vac, it’s not designed for this job and will likely clog or burn out. For a much cleaner and faster removal, consider renting a commercial-grade insulation removal vacuum. These powerful machines are built specifically to handle loose-fill insulation. They use long, wide hoses that you can run up into the attic, allowing you to suck the old material directly into large collection bags waiting outside. This method contains the mess significantly, preventing dust and debris from spreading throughout your home. It’s a smart investment that makes the cleanup phase much more manageable.
How to Prep Your Attic Space
A little prep work in the attic itself goes a long way. Start by creating a clear and safe path from the attic entrance to your work area. Cover the floor of your home leading to the attic access with plastic sheeting to protect it from tracked-in dust. Inside the attic, be extremely careful where you step. Only walk or place weight on the wooden ceiling joists, as the surface between them is just drywall and will not support you. It’s also a good idea to circulate fresh air by opening any attic windows or setting up a fan. Just be sure it's blowing air out of the attic, not back into your home.
A Step-by-Step Guide to DIY Insulation Removal
Removing old attic insulation is a dusty, demanding job, but it’s a crucial first step toward a more energy-efficient and comfortable home. If you’re set on tackling this project yourself, being prepared is everything. This guide breaks down the process into manageable steps, from gathering your gear to prepping the space for new, high-performance insulation. Remember, this is a physically intensive task that involves potential exposure to dust, debris, and other irritants. Taking your time and following each step carefully will help you get the job done safely and effectively, paving the way for a healthier home environment.
Step 1: Gear Up and Get Air Flowing
Safety should always be your top priority. Before you even think about touching old insulation, you need to protect yourself from airborne fibers and dust. Suit up with the right personal protective equipment (PPE): long sleeves and pants, heavy-duty gloves, safety goggles to shield your eyes, and a NIOSH-approved respirator or dust mask. It’s also vital to get fresh air moving through your workspace. Open any attic windows and set up fans to create cross-ventilation. This helps clear out dust and particles, making the air safer to breathe while you work. Properly preparing for your attic insulation project is the most important step.
Step 2: Contain the Mess Before You Start
Insulation removal is messy, but you can take steps to keep the dust and debris from spreading throughout your home. Lay down plastic sheeting on the floor of your attic and create a clean pathway from the attic access point to the nearest exit. Seal off any vents or openings that connect to the rest of your house with plastic and tape. For removing loose-fill material, a commercial-grade insulation removal vacuum is the best tool for the job. These powerful vacuums are designed to suck material directly into large-volume collection bags, containing the mess far more effectively than shoveling it into bags by hand.
Step 3: Remove the Old Insulation
The removal method depends on the type of insulation you have. If you’re dealing with blown-in fiberglass or cellulose, use the specialized vacuum to suck it up, working from the perimeter of the attic toward the access hatch. If you have batt insulation, carefully roll or fold the sections, trying not to shake them, which releases fibers into the air. Place the batts directly into heavy-duty contractor bags. Work methodically in small sections to keep the process organized and ensure you don’t miss any spots. Be mindful of your footing and only step on the attic joists to avoid accidentally putting a foot through your ceiling.
Step 4: Inspect for Damage, Pests, and Mold
With the old insulation gone, you have a clear view of your attic floor. This is the perfect time to play detective and inspect for underlying issues. Look closely for water stains on the wood, which signal leaks from the roof or pipes. Check for signs of pests, like droppings, nests, or chewed wires. You should also look for any dark, splotchy areas that could indicate mold growth. Addressing these problems now is critical. If you find evidence of pests or moisture, you may need to clean and sanitize the area to ensure your home’s air quality is protected before installing new insulation.
Step 5: Bag and Dispose of Debris Correctly
Proper disposal is just as important as proper removal. Make sure all insulation, dust, and debris are sealed tightly in heavy-duty contractor bags. Don’t overfill them, as they can become extremely heavy and prone to tearing. Once everything is bagged up, you’ll need to find out how to dispose of it legally. Most municipal trash services will not pick up construction debris with regular household garbage. You will likely need to transport it to a designated landfill or transfer station. Call your local waste management authority ahead of time to confirm their policies and any associated fees for insulation disposal.
Step 6: Prepare for Your New Insulation
The final step is to prepare the clean attic space for its new insulation. Before you lay down any new material, take the time to air seal the attic floor. Use caulk or canned spray foam insulation to fill any cracks, gaps, or holes around plumbing pipes, electrical wiring, vents, and light fixtures. This simple action prevents conditioned air from leaking out of your living space into the attic, which is one of the biggest sources of energy loss in a home. Once your attic is fully sealed, you’ll have a perfect blank slate ready for a fresh installation that will keep your home comfortable for years to come.
The Risks of DIY: Is It Worth It?
Tackling a home project yourself can be incredibly satisfying, but some jobs come with serious risks that are easy to underestimate. Removing old attic insulation is one of them. Before you pull on a pair of gloves and head upstairs, it’s important to understand the potential hazards. This isn’t just about getting dirty; it’s about protecting your health, your home’s structure, and even staying on the right side of the law. Let’s walk through the biggest risks so you can decide if this is a project you really want to take on.
Contaminants: Asbestos, Mold, and Pests
Your old insulation might be hiding more than just dust. Over the years, insulation can trap moisture, pests, and airborne contaminants, which can harm your home’s energy efficiency and your family’s health. When you start pulling out old material, you can release these particles into the air. If your home was built before the 1980s, there’s a chance the insulation contains asbestos, a known carcinogen that is extremely dangerous when disturbed.
Even in newer homes, old insulation that is damp, wet, or moldy needs to be removed carefully to prevent spreading mold spores throughout your home. Add in the potential for bacteria from rodent or insect droppings, and your attic can quickly become a hazardous work zone. Professionals use specialized containment and breathing equipment to manage these risks safely.
Hidden Structural and Electrical Dangers
Working in an attic requires careful footing. One wrong step off a joist could send you right through your ceiling, leading to costly repairs and potential injury. Beyond the obvious structural risks, your insulation is likely concealing a network of electrical wiring, junction boxes, and light fixtures. It’s easy to accidentally damage a wire you can’t see, creating a shock or fire hazard.
Rodent infestations and water damage, which are common reasons for insulation removal, add another layer of danger. Pests can chew through electrical wiring, leaving live wires exposed, while long-term leaks can weaken the wooden joists you’re relying on for support. Without a trained eye, you might not spot these hidden issues until it’s too late.
Understanding Local Disposal Laws
Once you’ve bagged up all that old insulation, what’s next? You can’t just leave it on the curb with your weekly trash. Each city and county has specific rules for disposing of construction materials, and insulation often requires special handling. Researching local regulations is a must to avoid fines and environmental issues.
Materials containing asbestos, for example, are considered hazardous waste and must be taken to a designated facility. Even standard fiberglass can have specific bagging and disposal requirements. A professional attic insulation service already knows the local disposal laws in Texas and has the process down, saving you the headache of navigating complex regulations and finding the right disposal sites.
DIY vs. Pro: Making the Right Call
Deciding whether to remove old attic insulation yourself or hire a professional can feel like a big decision. On one hand, a DIY project can save money. On the other, some jobs are best left to those with the right training and equipment. The right choice really comes down to the condition of your current insulation, your comfort level working in confined spaces, and most importantly, your safety.
Before you even think about grabbing a dust mask, it’s important to assess what you’re dealing with. Is your insulation just old and settled, or are there signs of bigger problems like water damage or pests? Answering this question is the first step in determining your path forward. Sometimes, you don’t even need to remove the old material; you can simply add new insulation on top. But if removal is necessary, understanding the risks versus the rewards will help you make a smart, confident call for your home and family.
When to Tackle It Yourself
If you’re considering a DIY approach, there’s good news. In many cases, you don’t need to remove old insulation at all. If the existing material is dry, free of contaminants, and not damaged, you can often add more insulation right on top to improve your home’s efficiency. This is the simplest and most cost-effective option.
However, if you’re set on a full replacement, a DIY removal is possible under the right conditions. This project is best suited for you if the insulation is clean and you’re comfortable working in your attic. It requires the right safety gear, including goggles, gloves, and a respirator, along with tools to bag the material without making a huge mess. If your attic is straightforward and the insulation is just old, not hazardous, you can likely handle the job yourself.
When to Call a Professional
This is one of those times when it’s better to be safe than sorry. You should call a professional for insulation removal if you see any red flags in your attic. These warning signs include damp or wet insulation, visible mold or mildew, or evidence of a pest infestation like droppings and nests. These issues are more than just messy; they can pose serious health risks.
Old, contaminated insulation can trap moisture and airborne pollutants, which can harm your home’s indoor air quality. Professionals have the specialized equipment to safely contain and remove hazardous materials like mold or pest-infested insulation without spreading them throughout your home. At EZ Attic, our team is trained to handle these situations, ensuring your attic is clean and safe before we install new insulation.
What to Expect for Professional Removal Costs
Hiring a professional for insulation removal is an investment in your home’s health and your own safety. Generally, you can expect the cost to range from $1 to $2 per square foot. The final price depends on factors like the type of insulation being removed, the size and accessibility of your attic, and the extent of any contamination. For a complete removal and cleanout, homeowners often pay between $1,600 and $3,600.
This cost typically covers everything from labor and equipment to the proper disposal of the old material. While it might seem like a significant expense, it buys you peace of mind. You won’t have to worry about handling potentially hazardous materials or disposing of them correctly. At EZ Attic Insulation, we offer a price match guarantee to ensure you get expert service at a fair price.
How to Choose the Right Insulation Removal Pro
If you’ve decided that DIY removal isn’t for you, the next step is finding a qualified professional to handle the job. This isn’t a decision to take lightly. The team you hire will be working in a critical part of your home, and the quality of their work directly impacts your home’s safety, comfort, and energy efficiency. A little research upfront can save you from major headaches down the road.
Choosing the right contractor means finding a team that is experienced, trustworthy, and transparent. You want someone who can clearly explain their process, prove their qualifications, and stand behind their work. A great company will make you feel confident and informed every step of the way. As a locally owned business, we know that trust is everything. When you start your search, look for a company that prioritizes safety and customer satisfaction, just like you would expect from a neighbor. Taking the time to vet your options ensures you partner with a true home efficiency expert who will treat your home with care.
Verify Their Credentials and Insurance
Before you talk about pricing or timelines, your first question should always be about credentials and insurance. This is non-negotiable. A professional company must carry liability insurance to protect your property from accidental damage and workers' compensation insurance to cover their crew in case of injury. Without it, you could be held financially responsible. Don’t just take their word for it; ask to see a certificate of insurance.
Proper training is also critical for using specialized equipment and handling potentially hazardous materials safely. A certified team knows how to manage everything from contaminated insulation to proper ventilation. At EZ Attic, we are 100% certified and insured, and we believe any professional you hire should be, too. It’s the baseline for any safe and successful project.
Ask About Their Process and Safety Measures
Once you’ve confirmed a company is insured, ask them to walk you through their removal process from start to finish. A seasoned pro will have a clear, systematic plan. What steps do they take to contain dust and debris? How do they protect your home’s interior? A thorough attic cleanout is essential before installing new insulation to ensure the new material performs its best and to avoid future problems.
Key safety measures should include sealing off the attic access, using HEPA-filtered vacuums to control airborne particles, and ensuring proper airflow. Their team should also be using appropriate personal protective equipment (PPE). A company that can’t give you detailed answers may lack the experience needed for the job. A clean process also contributes to better indoor air quality, which is a major benefit of professional removal.
Check Reviews, Warranties, and Guarantees
A company’s reputation is one of your best tools for making a final decision. Look for recent reviews on Google and other third-party sites to get an unbiased picture of the customer experience. While a perfect record is rare, you should see a consistent pattern of positive feedback regarding communication, timeliness, and quality of work.
Finally, ask about their guarantees. Do they offer a warranty on their workmanship? A company that stands behind its work gives you peace of mind that the job will be done right. For example, we offer a price-match guarantee to ensure you get fair and competitive pricing. Investing in a proper cleanout and new attic insulation is a significant step toward improving your home's energy performance, so make sure you choose a partner who guarantees their results.
Related Articles
- Should I Put New Insulation Over My Old Insulation?
- Attic Insulation Safety Tips
- Upgrading Insulation in Older Homes
- Managing Insulation Water & Storm Damage
- Texas Attic Insulation Services
Frequently Asked Questions
Can't I just add new insulation on top of my old insulation? While that can work in some situations, it's often not the best solution. You can only add more insulation if the existing material is completely dry, clean, and free of pests. If your old insulation is damp, moldy, or compressed, layering new material on top just traps the problem underneath. Removing the old stuff gives you a clean slate, allows you to fix hidden issues like air leaks or minor roof damage, and ensures your new insulation performs at its best.
What are the most obvious signs that my old insulation needs to be completely removed? Your attic will give you some clear signals. The most common red flags are visible water stains on the insulation or wood, a persistent musty smell that indicates mold or mildew, or any evidence of pests like droppings and nests. Also, if the insulation looks very dirty, dusty, or has settled so much that it's flat and clumpy, it has lost its effectiveness and is likely doing more harm than good to your air quality and energy bills.
How much does professional insulation removal usually cost? The cost for professional removal typically falls between $1 and $2 per square foot. For an average attic, this often totals between $1,600 and $3,600. This price doesn't just cover pulling out the old material; it includes the use of specialized, high-powered vacuums to contain the mess, labor from a trained crew, and the proper, legal disposal of all the debris. It’s an investment in getting the job done safely and cleanly.
What's the biggest risk if I try to remove the insulation myself? The biggest risk is your health. Old attics can contain hidden hazards you don't want to disturb without proper protection. You could unknowingly stir up mold spores, bacteria from pest waste, or even asbestos fibers in an older home, all of which can get into your home's air supply. Beyond that, there's a real physical danger of stepping off a joist and falling through your ceiling, which can cause serious injury and expensive damage.
If I hire a professional, what's the most important thing to ask them? Before you discuss anything else, you should ask, "Are you fully certified and insured?" This is the most important question because it protects you. Liability insurance covers any accidental damage to your property, and workers' compensation covers their crew if someone gets hurt on the job. A reputable company will be able to provide proof of both, giving you peace of mind that you won't be held responsible for accidents.