Insulation Baffles: A Complete Homeowner's Guide
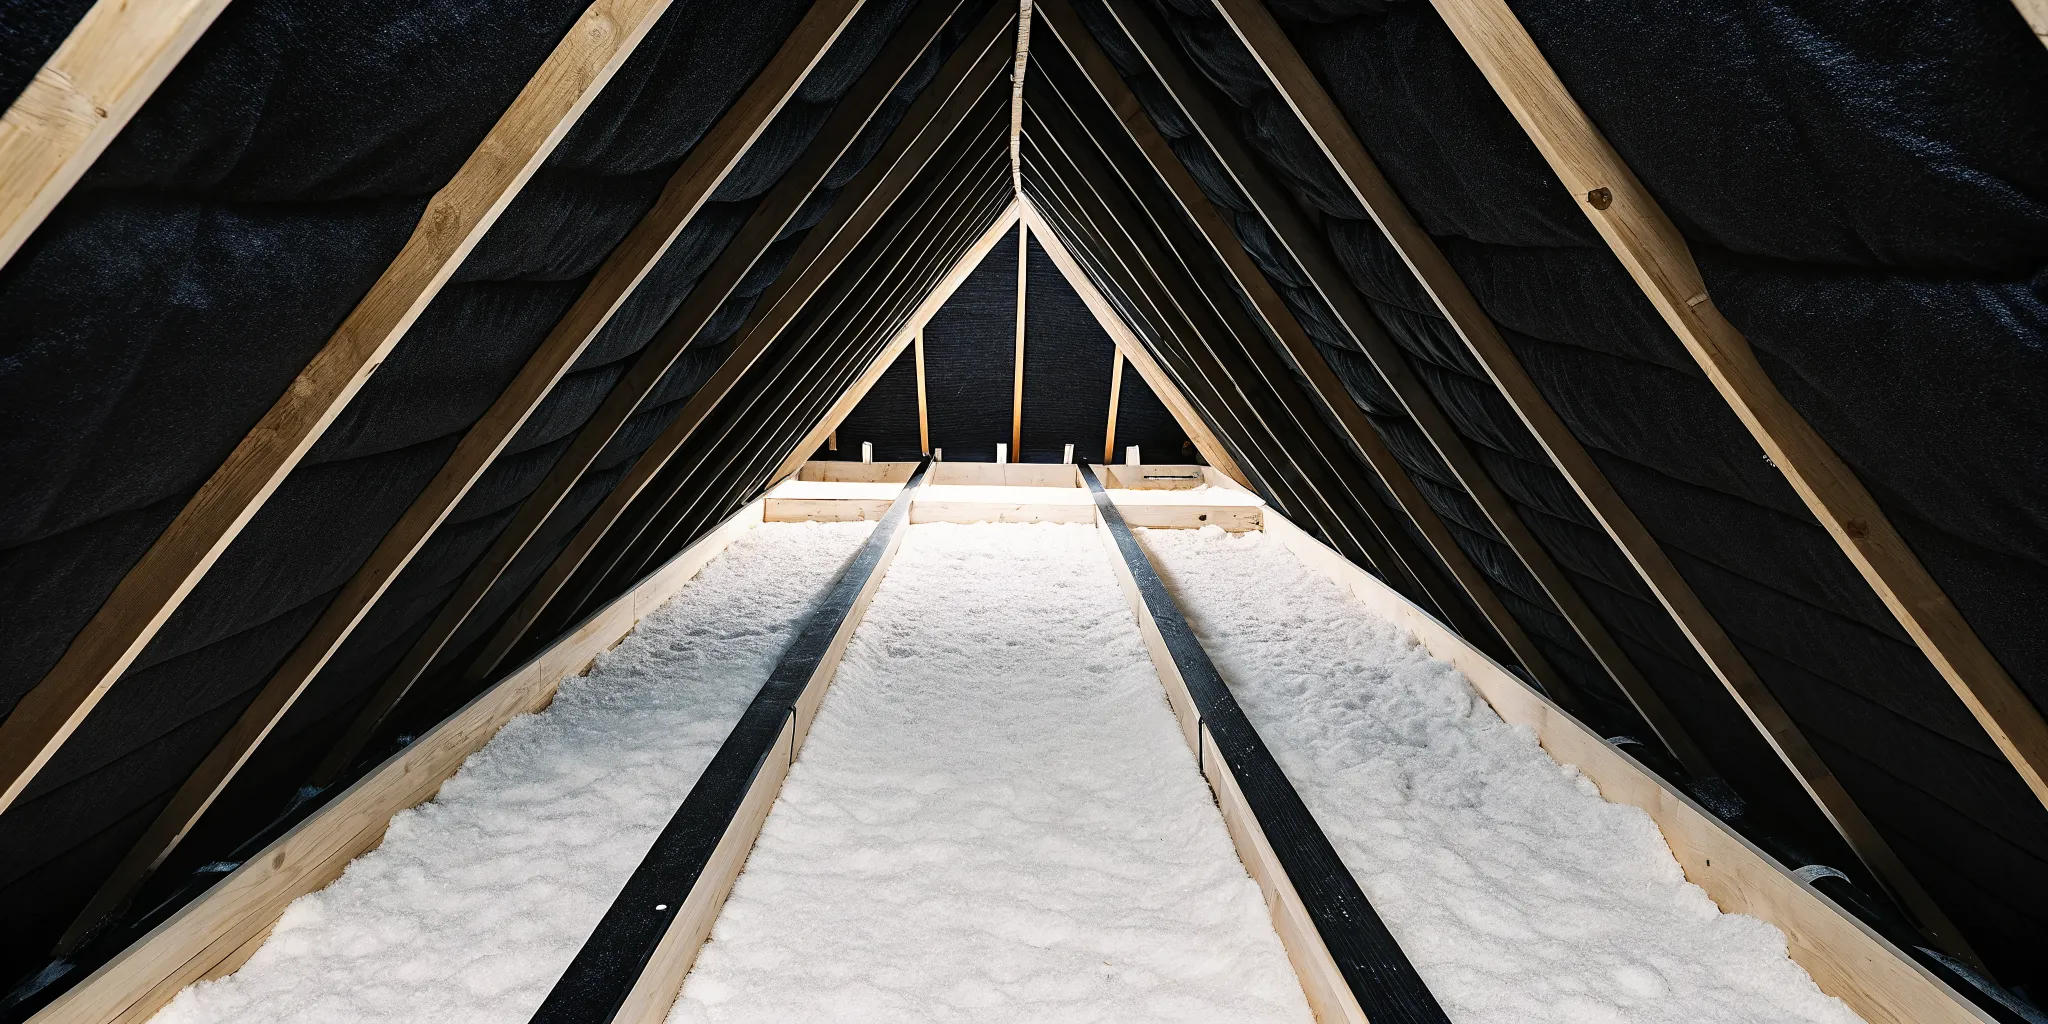
You invested in quality attic insulation to make your home more comfortable and lower your energy bills. But without the right support, that investment could be underperforming. When loose-fill insulation shifts, it can block the soffit vents at the edges of your attic, stopping airflow in its tracks. This trapped heat and moisture can reduce your insulation’s effectiveness and even lead to mold. Insulation baffles act as a simple but crucial barrier, protecting your ventilation pathways and safeguarding your insulation’s R-value. They ensure you get the performance and energy savings you paid for.
Key Takeaways
- Baffles create a dedicated airway: They act as a barrier to keep insulation from blocking your soffit vents, ensuring a clear path for air to flow from the edge of your roof up to the peak.
- Good airflow equals a healthier home: The continuous ventilation that baffles enable helps lower energy costs, stops moisture that can lead to mold and wood rot, and protects your roof shingles from extreme heat damage.
- Quality installation is non-negotiable: For long-term success, choose a durable material like plastic or foam that won't crush under insulation, and make sure a baffle is installed securely in every rafter bay.
What Are Insulation Baffles?
If you’ve ever peeked into your attic, you might have noticed long, narrow channels running along the underside of your roof. These are insulation baffles, and they play a surprisingly big role in your home's health and efficiency. Also known as rafter vents or vent chutes, these simple plastic or foam pieces are installed in each rafter bay to maintain a clear path for air to flow.
Think of them as the unsung heroes of your attic ventilation system. Without them, your attic insulation can shift and block crucial airflow from your soffit vents, leading to a host of problems you’d rather avoid. They work hand-in-hand with your insulation to create a comfortable and energy-efficient home.
How Do Baffles Actually Work?
Baffles create a dedicated channel between your roof deck and your insulation. This channel allows outside air to enter through your soffit vents (the vents under your roof’s overhang), travel up along the underside of your roof, and exit through exhaust vents near the peak. Their most important job is to act as a barrier, preventing fluffy blow-in fiberglass insulation from clogging the soffits. When soffits are blocked, your attic can’t breathe, trapping hot, moist air inside. By keeping this pathway clear, baffles ensure your ventilation system functions exactly as it should.
Why Attic Ventilation Is Key for Texas Homes
In Texas, our attics can feel like ovens, especially during the summer. Proper attic ventilation is non-negotiable for managing that intense heat and humidity. A well-ventilated attic continuously circulates air, pulling in cooler, drier air from the soffits and pushing out hot, moist air through the ridge vent. This constant airflow helps keep the temperature of your roof sheathing (the wood layer under your shingles) from soaring. This not only helps your shingles last longer but also reduces the strain on your air conditioning system. An attic solar fan can further improve this process, actively pulling hot air out to keep your home more comfortable year-round.
Key Benefits of Installing Insulation Baffles
Insulation baffles might seem like a minor detail in your attic, but they play a huge role in your home's overall health and efficiency. Think of them as the unsung heroes of your attic ventilation system. They work hand-in-hand with your attic insulation to create a space that’s dry, temperate, and energy-efficient. By maintaining a clear path for air to flow from your soffit vents up to your roof vents, baffles help your entire attic system function as it should.
For Texas homeowners, this is especially critical. Our hot, humid climate puts a massive strain on our homes. A properly ventilated attic is one of your best defenses against high energy bills, moisture damage, and premature roof aging. Installing baffles is a straightforward step that delivers significant returns by improving energy efficiency, preventing mold, protecting your insulation's value, and even extending the life of your roof. Let’s look at each of these benefits more closely.
Improve Your Home's Energy Efficiency
One of the most immediate benefits you'll notice is a more energy-efficient home. Baffles create a dedicated channel for airflow, which allows insulation, especially blow-in fiberglass insulation, to be installed to its full, recommended depth across the entire attic floor. Without baffles, insulation can block the soffit vents at the edges of your attic, creating uninsulated spots where heat can easily transfer.
By ensuring the insulation can fill every rafter cavity without creating gaps, baffles help you achieve the maximum R-value your insulation is designed to provide. This means your home stays cooler in the summer and warmer in the winter, forcing your HVAC system to work less and lowering your monthly energy bills.
Prevent Costly Moisture and Mold Damage
In a humid climate like ours in Texas, moisture is a constant concern. When warm, moist air gets trapped in an attic, it can condense on cooler surfaces, leading to wood rot and creating a perfect breeding ground for mold. Proper airflow is the key to preventing this. Baffles guarantee that air can circulate freely from the soffits, carrying this moisture out before it has a chance to settle and cause problems.
This continuous air movement keeps the underside of your roof deck dry and helps maintain healthy indoor air quality. Preventing mold growth not only protects the structural integrity of your home but also safeguards your family's health, as mold spores can contribute to respiratory issues. If you're concerned about air quality, you might also consider an air duct cleaning to ensure your whole system is clean.
Stop "Wind Washing" from Devaluing Your Insulation
"Wind washing" is a common problem that can seriously compromise your insulation's effectiveness. It happens when strong gusts of wind enter through the soffit vents and blow across or through your insulation. This air movement significantly reduces the insulation's thermal resistance, or R-value, making it far less effective at stopping heat transfer. In some cases, it can be as if the insulation isn't even there.
Insulation baffles act as a simple but effective shield. They block the wind from directly hitting your insulation while still guiding the air up along the roof deck where it's needed. This protects your investment and ensures your insulation performs at its peak, keeping your home comfortable year-round.
Safeguard Your Insulation's R-Value
Beyond wind washing, baffles protect your insulation's R-value in another important way: they hold it in place. Loose-fill insulation can shift or settle over time, and without a barrier, it can easily slide into the soffit vents and block them completely. When this happens, your entire attic ventilation system comes to a halt.
Baffles function as a dam, keeping your insulation where it belongs and ensuring your soffit vents remain unobstructed. This is crucial for maintaining the clear air path needed for proper ventilation. By keeping the vents open and the insulation in place, baffles help you get the long-term performance and R-value you paid for, whether you have batt insulation or blown-in materials.
Extend the Life of Your Roof
A well-ventilated attic doesn't just keep your home comfortable; it also protects your roof. During a scorching Texas summer, an unventilated attic can reach extreme temperatures, essentially baking your roof shingles from the inside out. This intense heat accelerates the aging process of the roofing materials, causing them to become brittle and fail much sooner than they should.
Baffles help solve this by promoting constant airflow that keeps the roof deck and shingles cooler. By allowing the underside of your roof to stay closer to the ambient outdoor temperature, baffles reduce the thermal stress that leads to premature wear. Combining baffles with an attic solar fan can further improve ventilation, helping you get the maximum lifespan out of your roof.
What Type of Baffle Is Right for Your Attic?
When you start looking at insulation baffles, you’ll quickly realize they aren’t all created equal. They come in a few different materials, and the best one for your home depends on your attic’s specific needs, the type of insulation you have, and your budget. Think of it like choosing tires for your car; you need the right fit for the conditions you’ll be facing. In Texas, where our attics bake in the summer sun, making the right choice is critical for keeping your home cool and your energy bills in check. A flimsy baffle might not hold up, compromising your entire ventilation system when you need it most.
The most common materials you’ll find are cardboard, foam, and corrugated plastic. Each one offers a different level of durability and performance. For example, if you’re planning to install dense spray foam insulation, you’ll need a much sturdier baffle than you would for light, fluffy fiberglass batts. The baffle’s job is to hold back the insulation, so its strength needs to match the insulation’s weight and pressure. Let’s walk through the options so you can feel confident picking the right one for your attic ventilation project.
Cardboard Baffles
Cardboard baffles are the most basic and budget-friendly option on the market. Often made from wax-coated or treated hardboard, they are designed to be a simple, cost-effective solution for creating an air channel. For many standard attic projects, especially those with lightweight fiberglass batt insulation, a simple hardboard baffle can get the job done without breaking the bank. They are a popular choice for DIYers or situations where cost is the primary concern.
While their low price is a major plus, it’s important to know their limitations. Standard cardboard can be flimsy and may get crushed when you add heavy insulation on top. It’s also more susceptible to moisture, which can cause it to soften and degrade over time. In a humid climate like ours in Texas, this is a significant drawback. If you’ve had moisture issues in the past, you should definitely consider a more robust material.
Foam Board Baffles
Foam board baffles are a solid step up from cardboard in both durability and performance. Made from materials like rigid polystyrene or flexible polyethylene, these baffles are much better at holding their shape under the weight of insulation. This rigidity is key because it ensures your ventilation path stays wide open, allowing plenty of air to flow from your soffits to your ridge vent. A proper air channel is what stops your attic from becoming an oven in July.
Because they are stronger and moisture-resistant, foam baffles provide a more reliable, long-term solution. They create an excellent barrier that keeps insulation from spilling into the soffit and blocking airflow, which is essential for maintaining your home's energy efficiency. While they cost a bit more than cardboard, many homeowners find the added durability and peace of mind are well worth the small extra investment for protecting their attic insulation.
Corrugated Plastic Baffles
If you’re looking for the most durable and reliable option available, corrugated plastic baffles are the way to go. These are the heavy-duty champions of the baffle world. Their rigid, plastic construction makes them incredibly strong and completely waterproof. They won’t bend, crush, or warp, even when paired with dense insulation like packed blown-in fiberglass or spray foam. They are built to last the lifetime of your home.
Because they are so sturdy, many professionals consider them the best choice for ensuring a permanent, high-performance ventilation channel. Brands like SmartBaffle are known for being much sturdier than other prefabricated options. While they are the most expensive choice, their long-term reliability means you can install them and forget about them, knowing your attic ventilation is protected for years to come. It’s a smart investment in your home’s future.
What to Look For When Choosing Baffles
When you’re comparing baffles, think about long-term performance. The main goal is to create a clear, protected air channel that won’t get blocked. First, look for a baffle that is compatible with your insulation type. A sturdy plastic baffle is an excellent partner for spray foam, as it provides a reliable barrier that won’t fail under pressure. Second, consider durability. You want a material that can resist moisture and won’t be crushed by your insulation.
Finally, check the depth of the air channel the baffle creates. Most are designed to provide a one- to two-inch gap, which is ideal for proper airflow. A well-designed baffle allows insulation to fill the entire rafter cavity without gaps, which helps you get the maximum R-value and better energy efficiency year-round. Choosing a quality baffle ensures your entire attic system works together to keep your home comfortable.
Popular Baffle Brands to Consider
When you start looking at insulation baffles, you’ll find a handful of brands that consistently come up. While you don’t need to become an expert on every single one, knowing the key players can help you have a more informed conversation with your insulation contractor. These brands are known for their quality and reliability, offering different materials and designs to suit various attic configurations and budgets. Understanding what makes each one a solid choice will help you feel confident in the products being installed in your home.
SmartBaffle by DCI Products
If durability is your top priority, SmartBaffle is a name you'll want to know. Made from rigid corrugated plastic, these baffles are incredibly sturdy and resistant to moisture. They are designed to create a strong, continuous airflow channel from your soffit vents to the ridge vent. This design is particularly effective when paired with spray foam insulation, as it prevents the foam from blocking ventilation. The manufacturer promotes its SmartBaffle as a top-tier option for maximizing airflow and protecting your insulation’s performance.
Owens Corning Raft-R-Mate
Owens Corning is one of the most recognizable names in the insulation industry, and their Raft-R-Mate baffles live up to the brand's reputation. These baffles are typically made from extruded polystyrene foam, making them lightweight and easy for professionals to install. They are designed to work seamlessly with the company’s popular pink Fiberglas™ insulation, ensuring that your blown-in or batt insulation stays right where it belongs without obstructing airflow. Choosing a product from a trusted, comprehensive system like Owens Corning gives many homeowners peace of mind.
CertainTeed
CertainTeed is another industry giant that offers a complete line of building materials, including insulation baffles. Their baffles are designed to integrate with their broader insulation systems, which include everything from fiberglass to mineral wool. Like Owens Corning, CertainTeed’s baffles are engineered to maintain a clear ventilation path in the rafter bays, preventing moisture buildup and protecting the R-value of your insulation. Opting for a CertainTeed baffle means you’re getting a product designed to work as part of a proven, high-performance system.
How to Compare Your Options
When deciding between brands, the biggest factor often comes down to material and sturdiness. While foam and cardboard baffles can do the job, they are more prone to damage during installation or over time. Corrugated plastic options, like the SmartBaffle, offer superior rigidity and longevity. This makes them an excellent investment for ensuring your attic ventilation system remains effective for years. Ultimately, the best choice depends on your specific attic needs and the type of attic insulation you have. A professional can help you weigh the pros and cons of each material for your home.
How to Install Insulation Baffles: A Step-by-Step Guide
If you’re comfortable working in your attic and have some basic DIY skills, installing insulation baffles can be a manageable weekend project. The key is to work carefully and ensure you get a tight, secure fit to create that all-important air channel. A proper installation will protect your insulation and keep your attic breathing correctly for years to come.
Before you begin, remember that attics can be tricky spaces to work in, with limited headroom and potential hazards. Always prioritize your safety by wearing the right gear and being mindful of your footing. If you’re dealing with a new attic insulation install or have existing moisture issues, it’s especially important to use high-quality materials and get the installation right. Let’s walk through the process step by step.
Gather Your Tools and Materials
First things first, let's get your supplies in order. Having everything on hand before you climb into the attic will make the job go much smoother. You don’t want to be running back and forth to the garage.
Here’s what you’ll generally need:
- Safety Gear: A dust mask, safety glasses, and gloves are non-negotiable.
- Measuring Tape: For checking the distance between your rafters.
- Utility Knife: To trim baffles to the perfect size.
- Staple Gun: A heavy-duty one with at least 3/8-inch staples.
- Insulation Baffles: Enough to cover every rafter bay along your soffit vents.
- Sealant: Caulk or a can of spray foam to seal any gaps.
Step 1: Measure Your Rafter Bays
Your first task in the attic is to measure the space between your roof rafters. This will tell you what size baffles to buy. Most modern homes have rafters spaced either 16 or 24 inches apart "on-center," which typically leaves an actual gap of about 14.5 or 22.5 inches. Most baffle brands are designed to fit these standard sizes snugly. If you have non-standard spacing, you’ll just need to trim your baffles to fit. This process is similar to fitting batt insulation, which is also designed for standard rafter bay widths. Taking accurate measurements ensures you get a tight fit and avoid air leaks from the start.
Step 2: Cut the Baffles to Size
Even with standard spacing, you might need to make some adjustments. Use your utility knife to carefully trim the baffles as needed for a perfect fit. The goal is to have the baffle sit flush against the roof decking and the sides of the rafters without buckling or leaving large gaps. A durable baffle is important here, as it needs to be strong enough to hold back the full weight of your insulation without breaking or collapsing. Whether you’re using loose-fill fiberglass or dense spray foam, a sturdy baffle will keep your ventilation path clear and protected.
Step 3: Position and Secure the Baffles
Now it’s time to put the baffles in place. Start at the very edge of your attic, where the roof meets the walls (the soffit area). Slide the baffle down into the rafter bay until its lower edge extends into the soffit, clearing the vent. The top of the baffle should extend above the planned height of your insulation. This ensures airflow isn't blocked. Once it’s positioned correctly, use your staple gun to secure the baffle’s flanges to the roof decking and the sides of the rafters. This creates a dedicated channel for air to flow from your soffits toward the ridge, which is a key part of a healthy attic ventilation system that can be supported by an attic solar fan.
Step 4: Seal All Edges
This step is absolutely critical for preventing moisture problems. Even with a snug fit, small gaps can remain between the baffle and the wood framing. Air and moisture can sneak through these gaps, leading to condensation right at the edge of your attic. To stop this, use caulk or low-expansion spray foam insulation to seal every edge of the baffle. Run a bead of sealant where the baffle meets the top plate of the wall and along the sides where it touches the rafters. This creates an airtight seal, ensuring outside air stays in its designated channel and doesn’t mix with the conditioned air in your attic.
Step 5: Add Your Attic Insulation
With your baffles installed and sealed, you’re ready for the final step: adding the insulation. The baffles will now act as a protective barrier, holding the insulation back from the soffit vents and maintaining that crucial air gap. You can now install your chosen insulation material, whether it’s blown-in fiberglass, batts, or spray foam. The baffles will ensure your insulation can do its job effectively without obstructing ventilation. For example, installing a durable baffle before applying spray foam creates a powerful combination of thermal performance and long-term moisture protection for your home.
Common Installation Mistakes to Avoid
Installing insulation baffles might seem like a straightforward weekend project, but a few common slip-ups can easily undermine all your hard work. Getting the details right is essential for ensuring your attic can breathe properly and your insulation performs at its best. Think of it this way: your attic ventilation system is only as strong as its weakest link. A poorly installed baffle can create that weak link, leading to moisture problems and energy loss. Let's walk through the most frequent installation mistakes so you can get the job done right the first time.
Forgetting to Install a Baffle in Every Bay
It can be tempting to skip a few rafter bays, especially in tight or hard-to-reach corners of your attic. However, this is one of the biggest mistakes you can make. For proper ventilation, you need a clear air channel in every single bay where a soffit vent is present. Skipping even one creates a dead air space where moisture can accumulate. This trapped humidity can lead to wood rot, mold growth, and damp, ineffective attic insulation. Consistency is everything. Installing a baffle between every rafter ensures your entire attic gets the continuous airflow it needs to stay dry and healthy.
Placing Baffles Too High or Low
The placement of your baffle is critical for creating an effective air channel. If a baffle is installed too low, it can get covered when you add blow-in insulation, completely blocking the airflow from your soffit vent. If it’s placed too high and doesn't extend down to the top plate, it fails to connect with the incoming air. Either mistake renders the baffle useless. The goal is to create a clear, protected pathway that guides air from the soffit, up over the insulation, and into the attic. Make sure each baffle extends from the very bottom of your roof deck all the way past the intended height of your insulation to prevent any blockages.
Not Securing Baffles Tightly
A loose baffle is a future problem waiting to happen. Baffles that are just placed in the bay without being properly fastened can easily be dislodged. The force from a professional insulation blower or even just shifting temperatures over time can cause them to slip out of place. Once a baffle moves, it can block the ventilation channel it was meant to create. This can trap moisture and lead to serious issues. To install insulation stops correctly, use a staple gun to secure the baffle’s flanges tightly against the roof decking and the sides of the rafters. This ensures it stays put and keeps the airway open for years to come.
Leaving Gaps Around the Edges
Even if your baffles are placed correctly and secured tightly, small gaps around the edges can compromise your attic’s efficiency. These gaps allow conditioned air from your living space to leak into the attic, a process known as air leakage. In the summer, this means your expensive cool air is escaping, forcing your AC to work harder. These gaps also create a path for moisture to bypass the baffle and condense on the underside of your roof deck. To prevent this, it’s smart to seal the edges of each baffle with a small amount of spray foam or caulk. This creates an airtight channel and is a key step in any comprehensive home efficiency project.
Are Baffles the Right Solution for Your Attic?
Deciding if baffles are the right move for your attic isn't always a simple yes or no. While they are a fantastic tool for improving ventilation, they are just one part of a larger system. Think of your attic's ventilation like a team: for it to work well, every player needs to do its job. Baffles are a key player, but their effectiveness depends entirely on the condition of the rest of the team, specifically your intake and exhaust vents. A properly ventilated attic works hand-in-hand with good attic insulation to keep your Texas home comfortable and your energy bills down, especially during those scorching summers.
The goal is to create a continuous flow of air. Cool, dry air enters through vents at the lowest point of your roof (the soffits), and hot, moist air exits through vents at the highest point (the ridge). Baffles ensure the first part of that journey happens without a hitch. But if the entry or exit points are blocked or non-existent, baffles can't perform their magic. Sometimes, installing them is the final piece of the puzzle for an efficient attic. Other times, your attic might need more foundational work before baffles can make a real difference. Let's look at when baffles are the star solution versus when you need to take a more comprehensive approach.
When Baffles Are the Primary Fix
Baffles are the perfect solution when you have a functioning ventilation system that's being smothered by insulation. This is a very common issue, especially after new blow-in insulation is added. The lightweight insulation can easily drift into the eaves, covering your soffit vents and blocking the path for fresh air to enter the attic. Without that intake, your whole system stalls.
In this scenario, baffles are the direct fix. These simple channels are installed against the roof deck in each rafter bay, creating a protected airway. They act as a barrier, holding the insulation back so air can flow freely. This is also critical when using spray foam insulation, as baffles ensure you can fill the cavity for maximum R-value without accidentally sealing off your ventilation path.
When Your Attic Needs a More Comprehensive Approach
If your attic has poor ventilation to begin with, baffles alone won't solve the problem. For instance, if your home has solid soffits with no vents at all, there's no intake air for baffles to channel. In this case, the first step is to create that airflow by installing new soffit vents. Baffles are only effective once there's a clear path for air to enter your attic from the outside.
You also need to check that your existing vents are working properly. Over time, soffit vents can get clogged with paint, dust, and debris, rendering them useless. Similarly, your attic needs a way for hot, moist air to get out, which requires functional exhaust vents like ridge vents. An attic solar fan can also be a great addition to actively pull hot air out. Baffles support a healthy ventilation system; they can't create one from scratch.
DIY vs. Professional Baffle Installation
Deciding whether to install attic baffles yourself or hire a professional comes down to more than just your budget. It’s about ensuring your attic ventilation system works correctly for years to come, which is especially important in the Texas heat. While a DIY installation is possible for some, it’s a project where small mistakes can lead to big problems like moisture damage and reduced energy efficiency. An improperly placed baffle can do more harm than good, trapping humid air or failing to create the necessary air channel for your soffit vents to function. This can quickly lead to mold growth or even wood rot in your roof structure.
Before you climb into the attic, it's important to weigh the pros and cons. Consider your experience level with home improvement, the complexity of your attic’s layout, and how much time you're willing to commit to a hot, cramped space. Getting it right the first time is crucial for protecting your home's structure and your insulation investment. Let's walk through when you might tackle this yourself and when it’s smarter to call in the experts to handle the job with precision.
When to Consider a DIY Installation
If you’re comfortable working in tight spaces and have a good handle on home improvement projects, you might consider installing baffles yourself. This is most manageable in an attic with a simple layout, easy access, and before new insulation is added. For example, if you're doing a major attic overhaul, you can install high-quality baffles to create clear channels for airflow before adding new blow-in insulation. You’ll need the right safety gear (like a mask, gloves, and goggles), a staple gun, and a utility knife, along with the patience to ensure every baffle is placed correctly without blocking your soffit vents.
Why It's Smart to Call a Professional
While DIY can be tempting, baffle installation is a job where precision is everything. If a baffle doesn’t span the full width of the rafter bay or isn't sealed properly, it can allow air to leak, leading to moisture condensation and potential rot. Professionals have the experience to handle tricky rooflines, work around obstructions, and ensure every vent has a clear path for airflow. They can also spot other issues you might miss, like hidden air leaks or inadequate existing insulation. Hiring a certified team for your attic insulation project guarantees the job is done right, protecting your home and maximizing your energy savings from day one.
Related Articles
- Understanding Attic Ventilation - Ez Attic Insulation
- Texas Attic Insulation Services - Ez Attic Insulation
- Best R-Value Insulation: A Homeowner's Guide - Ez Attic Insulation
- Will Insulating My Attic Keep My House Cooler? - Ez Attic Insulation
- Fiberglass Batting Insulation Service in Texas - Ez Attic Insulation
Frequently Asked Questions
Do I really need to put a baffle in every single rafter bay? Yes, you absolutely do. For your attic ventilation system to work correctly, it needs a continuous path for air to flow. Skipping even one bay creates a dead air spot where hot, moist air gets trapped. This can lead to condensation, mold, and wood rot over time. Think of it as building a highway for air; leaving out a section would cause a major traffic jam. Consistency is the key to keeping your entire attic dry and healthy.
My attic already has insulation. Is it too late to install baffles? It's not too late, but it is a much more challenging job. To install baffles in an attic with existing insulation, you have to carefully move the insulation out of the way at the eaves, install the baffle, and then put the insulation back. This can be a messy and difficult process, especially in a cramped attic. It's also harder to get a perfect seal around the baffle when you're working around loose material. This is often a situation where calling a professional is a smart move, as they have the right tools and experience to do it efficiently.
What’s the real difference between a cheap cardboard baffle and a more expensive plastic one? The main difference comes down to durability and long-term performance. Cardboard baffles are a budget-friendly option, but they can be flimsy. They might get crushed under the weight of heavy insulation or soften and degrade over time if they get damp, which is a real concern in a humid climate. A rigid plastic baffle is a much more reliable, long-term investment. It won't bend, break, or be affected by moisture, ensuring your ventilation channel stays open for the life of your home.
Will installing baffles automatically lower my high energy bills? Baffles are a critical piece of the energy efficiency puzzle, but they work as part of a team. Their job is to ensure your attic has proper airflow, which allows your insulation to perform at its best. This combination of effective ventilation and insulation is what truly lowers your energy bills. If your insulation is old and thin, or if your attic has other air leaks, baffles alone won't solve the problem. They are a vital step, but they work best as part of a complete attic system.
How can I tell if my soffit vents are actually working? You can start with a simple visual inspection. From outside your home, look under the overhang of your roof for the vents. Check to see if the openings are clogged with paint, dirt, or debris from landscaping. From inside your attic on a bright day, carefully look toward the eaves. You should be able to see small slivers of daylight coming through the vents. If you see no light at all, your vents are likely blocked or may not have been installed in the first place.