Attic Insulation Installation Process Houston: Job Day Guide
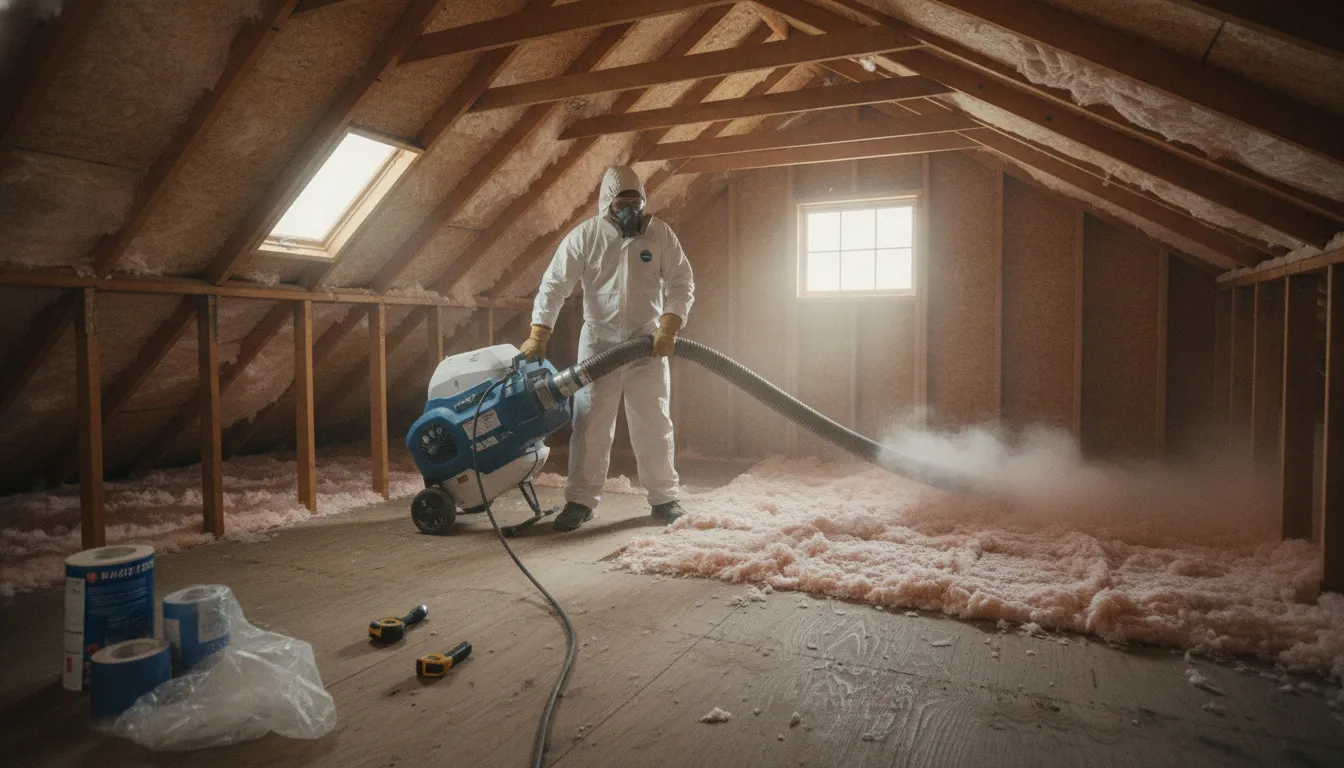
When your Houston home stays warm upstairs, the attic often deserves a closer look before you assume the air conditioner is the problem. Understanding the attic insulation installation process houston homeowners can expect makes the project more straightforward and helps you ask better questions before work begins.
In general, the process starts with an attic inspection and clear recommendation, followed by preparation, air sealing when appropriate, and installation of the selected insulation. The crew then confirms whether the space can be occupied, checks coverage and distribution, and cleans the work area before wrapping up.
EZ Attic Insulation takes a transparent, local approach for homeowners across Greater Houston. The exact scope and schedule can vary with attic condition, size, access, material, and whether old insulation needs to be removed. Installation-only work typically takes 2-3 hours, while removal plus installation typically takes 4-8 hours, but those ranges are not a promise for every home. If you are comparing the types of attic insulation, the inspection is the right place to connect material choice with your attic's actual needs. Hablamos Espanol! The first step is understanding what the specialist evaluates before installation begins.
Book Now for a free attic inspection.
Before the Install: What Happens During the Inspection
For a Houston homeowner, the inspection is where an attic insulation project becomes a clear plan instead of a guess. EZ Attic Insulation documents a free inspection by an Energy Efficient Specialist, followed by an estimate based on what the attic and home actually require. You should expect an explanation of the proposed scope, not a one-size-fits-all recommendation.
The specialist will need to understand the condition of the attic, its size and access. They also evaluate the material suited to the project and whether old insulation needs to be removed. These variables affect the work plan and timing, so two homes in the same Greater Houston neighborhood may need different approaches. A project involving removal and installation is not the same as adding insulation in an attic that is already suitable for the work.
What the inspection helps clarify
EZ Attic's documented process begins with inspection and estimate, then moves to preparation, equipment-based installation, a check for even distribution, and cleanup. The inspection is therefore an important opportunity to discuss the full sequence before anyone begins work. Ask whether the recommendation is installation-only or includes removal, what material is being proposed, how the crew will access the attic, and what preparation is included.
It is also reasonable to ask what the crew will look for before installation and how the completed work will be reviewed. Request that the estimate describe the agreed scope in plain language. If access is limited, the attic is unusually large, or existing insulation is damaged or difficult to handle, ask how that condition changes the plan. The goal is not to predict the result from the doorway. It is to make sure the homeowner and installer share the same understanding of the work.
How to prepare for a useful visit
Before the appointment, note the rooms that feel unusually hot or cold, any comfort pattern you have noticed, and whether the home has had previous insulation work. Make sure the specialist knows about attic access limitations and any concerns about the work area. You do not need to diagnose the attic yourself. Bring your questions, listen for a clear explanation of the variables, and ask what happens next.
That transparent approach is especially valuable in Houston, where homeowners may be comparing options for older homes, newer construction, or properties that have already been upgraded. A careful inspection gives the installation team the information needed to recommend a defined scope while giving you a practical basis for deciding whether the plan fits your home.
What Happens During Blown-In Attic Insulation Installation?
A professional blown-in job is more than feeding insulation into an attic and spreading it around. The crew prepares the ceiling plane, protects ventilation paths, installs the material with purpose-built equipment, and checks the finished coverage before leaving. The exact scope can vary with attic size, access, existing insulation, and whether old material needs to be removed. For a closer look at the material itself, see our blown-in fiberglass insulation guide.
-
Prepare the work area and air seal the ceiling plane
The installation begins with preparation, not blowing. The crew reviews the work area, protects the access path, and identifies the attic floor or ceiling-deck areas that need attention. If old insulation is being replaced, removal creates an opportunity to find and seal air leaks before new insulation covers them. Air sealing commonly addresses penetrations around wiring, pipes, light fixtures, and other openings with an appropriate sealant, one-part spray foam, or rigid blocking as needed. The U.S. Department of Energy's Building Science Education site recommends air sealing the ceiling deck before installing blown insulation in an existing vented attic: see the installation guidance.
-
Install baffles where the attic needs protected airflow
Baffles are placed at the eaves or other ventilation locations when needed. They create a defined channel for air movement while helping keep loose-fill insulation from spilling into the soffits. This matters because insulation should improve the thermal boundary without blocking the attic's intended ventilation route. The same building-science guidance explains that baffles help maintain ventilation and prevent insulation from falling into the eaves.
-
Blow the fiberglass into the attic floor
For a vented attic, loose-fill fiberglass is installed across the attic floor at the ceiling plane. A hose connected to specialized equipment moves the material from outside or from a staging area into the attic. The installer directs the flow into open areas and around obstacles, rather than relying on hand placement alone. The goal is consistent coverage across the conditioned space below. Areas with difficult access receive careful attention so the finished layer does not leave thin spots.
-
Distribute the insulation evenly and verify coverage
After installation, the crew checks the distribution across the attic floor. The depth should be as even as practical, and the insulation should extend across the ceiling area to the top plate. Gaps, voids, compression, and areas blocked by framing or access points can reduce the value of otherwise good material. EZ Attic's documented process specifically includes a post-installation check for even distribution. This quality check is especially important when the attic has irregular corners, tight spaces, or a mixture of old and new insulation.
-
Clean the work area and review the completed job
Cleanup is the final part of the installation process. The crew removes protective materials, collects loose debris from the work path, and leaves the access area orderly. A final review gives the homeowner an opportunity to discuss what was completed, where the new insulation was placed, and whether the project included removal, air sealing, or installation only. In Greater Houston homes, a clear walkthrough helps ensure the finished work matches the agreed scope rather than treating every attic as identical.
How Long Does the Attic Insulation Installation Process Take in Houston?
For many Houston homeowners, installation-only attic insulation work typically takes 2 to 3 hours. That range generally applies when the existing insulation is suitable to remain in place, such as in a newer home or one with recently upgraded insulation. A full-service project that includes removing old or damaged insulation before installing fresh material typically takes 4 to 8 hours.
| Project type | Typical range | Scope |
|---|---|---|
| Installation only | 2 to 3 hours | Adding insulation when existing material is suitable. |
| Removal and installation | 4 to 8 hours | Removing old or damaged insulation, then installing fresh material. |
These ranges help with planning. They are not universal guarantees. The schedule for your home depends on several conditions that cannot be judged accurately from the living space alone.
What can change the installation schedule?
- Attic condition: An attic may need additional preparation before new insulation is installed. Existing insulation, debris, or areas requiring attention can affect the work sequence.
- Attic size: A larger attic generally requires more time to prepare and cover evenly than a smaller attic.
- Access: Limited or difficult access can make it more time-consuming to move equipment and materials into the work area and distribute insulation properly.
- Material and installation method: The selected insulation material and the way it is installed influence the project steps and total work time.
- Removal requirements: Removing old insulation adds a separate phase before installation begins. That is why removal plus installation has a longer typical range than installation-only service.
For a documented blown-in fiberglass project, the work includes preparation, equipment-based installation, a check for even distribution, and cleanup. In an existing vented attic, air sealing and ventilation preparation may also be part of the process. For example, baffles help maintain ventilation and keep insulation from falling into the eaves, while air sealing should happen before blown insulation is installed.
The most reliable way to plan your day is to start with an attic inspection and clear scope of work. EZ Attic Insulation documents a free inspection by an Energy Efficient Specialist. Ask which service applies to your attic, whether removal is needed, what access the crew will require, and which timing range fits the recommended work. That conversation gives Houston homeowners a more useful schedule than a one-size-fits-all promise.
Will You Need to Leave During Installation?
Not necessarily. Homeowners should not assume that every attic insulation project requires them to leave the house. Access and occupancy guidance can vary based on the insulation material, the condition of the attic, the work being performed, and how the crew needs to move through the home. The most reliable approach is to discuss the plan with your installer before work begins.
Installation-only work may involve adding insulation to an attic that is already in suitable condition. A removal-and-replacement project has a different scope because the existing material is taken out before new insulation is installed. Those differences can affect the work area, access points, expected activity inside the home, and how the crew coordinates with your household.
What should you confirm before installation?
Ask the installer a few practical questions during scheduling or the pre-installation visit:
- Which rooms or entry points will the crew need to access?
- Will anyone need to remain away from a particular work area while the crew is present?
- Should pets, children, or sensitive household members stay in another part of the home during active work?
- What preparation is needed around attic access, furniture, stored items, or the path to the work area?
- When will the crew complete cleanup and the final distribution check?
These questions are not a reason to worry. They simply help you plan the day around the actual conditions of your home instead of relying on a one-size-fits-all rule. If you work from home, have appointments, or need a quiet environment, tell the installer in advance so the schedule and access plan are clear.
Before the crew arrives, secure pets, clear the agreed access route, and move fragile or valuable items away from the work path if requested. Keep the installer informed about any household considerations that could affect access. A clear conversation before the job is the best way to know whether you can remain home and how to prepare.
After Installation: How Do You Know the Work Was Done Right?
A professional installation should finish with more than a quick look from the attic hatch. The crew should walk through the completed work, confirm that insulation is distributed consistently, and leave the work area orderly. EZ Attic Insulation documents this final stage as a post-installation check for even distribution followed by cleanup.
Start by looking across the attic floor from several angles. Loose-fill insulation should have an even depth rather than tall piles in one area and thin patches in another. The insulation should extend across the entire ceiling area to the top plate, which is the upper framing member where the wall meets the ceiling. Missing coverage along the edges can leave parts of the home with less thermal protection.
Next, check the quality of the installation itself. There should be no obvious gaps, voids, compressed sections, or areas where the insulation has shifted away from the air barrier. Compression matters because packed-down insulation may not provide the coverage intended by the installation plan. Misalignment around penetrations, framing, or other boundaries also deserves attention.
A practical final-walkthrough checklist
- Is the depth reasonably consistent across the attic floor?
- Does insulation reach the top plate around the perimeter?
- Are there visible gaps, bare patches, voids, compression, or misaligned sections?
- Has the distribution been checked after equipment-based installation?
- Has the crew removed loose material and cleaned the access area?
Ventilation components should remain unobstructed. Where the attic design uses baffles, they help maintain airflow and keep insulation from falling into the eaves. Ask the installer to point out these areas during the walkthrough rather than assuming every attic has the same layout.
If the project uses blown-in fiberglass, its adaptable texture can help fill around irregular areas and gaps, while also helping reduce noise. You can review professional blown-in insulation services for material-specific details. Before the crew leaves, ask what was installed, whether any areas were excluded because of access or attic conditions, and what follow-up questions they recommend. A clear walkthrough gives you a documented understanding of the finished work instead of leaving you to judge it from the hatch.
Book Now for a professional attic inspection and installation walkthrough.
Frequently Asked Questions
What are the steps involved in installing attic insulation?
The process starts with an attic inspection and estimate, followed by preparation of the work area. If old or damaged insulation needs to be removed, that happens before the new material is installed. For blown-in insulation, the ceiling deck should be air sealed first, and baffles may be used to maintain ventilation at the eaves. The crew then installs the insulation with equipment, checks that it is distributed evenly, and cleans the work area before the job is complete. You can review the federal guidance on blown insulation in existing attics for additional technical context.
How long does attic insulation installation take in Houston?
Timing depends on the attic's condition, size, access, material, and whether old insulation must be removed. Installation-only work for a newer home or recently upgraded attic typically takes 2 to 3 hours. A full-service project that combines removal and installation typically takes 4 to 8 hours. These are useful planning ranges, not guarantees, so the inspection is the best time to confirm the expected scope and schedule.
Will I need to leave my home during installation?
Not every project requires the homeowner to leave. Occupancy and access guidance depends on the material, attic conditions, and work being performed. Ask the installer what areas need to remain accessible and whether your household should make temporary arrangements for the specific job. Confirming those details before installation helps the crew work efficiently and gives your family a clear plan.
How can I tell whether the insulation was installed correctly?
Look for even distribution across the attic floor, complete coverage to the top plate, and no visible gaps, voids, compression, or misalignment with air barriers. The final process should include a post-installation distribution check and cleanup. If the project includes blown-in material, ask how ventilation paths and baffles were handled so insulation does not block the eaves.
Which insulation material is right for my Houston attic?
There is no single material that fits every attic. Options may include blown-in fiberglass, batt fiberglass, spray foam, and radiant barrier. The appropriate choice depends on the attic's condition, access, existing insulation, ventilation, and the goals for the home. A documented inspection can help separate installation-only work from removal and replacement and support a recommendation suited to the property.
Ready to Improve Your Houston Home's Comfort?
A clear inspection and final walkthrough can help you understand what your attic needs before installation begins. EZ Attic Insulation is locally and family-owned, 100% certified and insured, and ready to discuss the right next step for your home. Hablamos Espanol!
Book a free attic inspection or request a quote for your Houston-area project.